New Roof Installation: The Process Explained
What actually happens when a roofing crew shows up — day by day, from tear-off to final inspection. No surprises.
Most homeowners replace a roof once or twice in their lifetime. It’s disruptive, expensive, and unfamiliar. Understanding what the crew actually does each day (and what you need to do as the homeowner) removes most of the anxiety.
Here’s the process from the morning the dumpster arrives to the day the inspector signs off.
Before the crew arrives: what happens at your house
Permits and material delivery
A professional contractor pulls the permit before work starts. In most jurisdictions, the permit is posted on your front door or porch. Material delivery usually happens 1–2 days before the crew. You’ll see a roofing materials supplier drop bundles of shingles, rolls of underlayment, flashing, and vents on your driveway.
Inspect the material bundles before the crew covers them. Verify the brand, line, and color match what you ordered. A reputable contractor won’t object to you confirming the right product arrived.
Protecting your property
The contractor should cover landscaping, move items away from the house perimeter, and place plywood paths over grass if the crew will walk on it. Remove vehicles from the garage and driveway. Falling debris and nails travel farther than you’d expect.
If you have a satellite dish, security cameras, or gutter guards, flag them with the project manager. These get damaged when crews are focused on the roof.
Tarping and contingency planning
The contractor should have tarps ready in case weather rolls in unexpectedly. Ask where they are and who decides when to deploy them. A responsible crew doesn’t hope for clear skies; they plan for rain.
Day 1: tear-off and inspection
The tear-off
The crew starts by removing the old roofing. They use tools called “tear-off shovels” — flat shovels with notched edges designed to slide under shingles and lift them off.
Tear-off is loud. The dump trailer or dumpster fills fast. A standard roof generates 2–4 tons of debris.
What to watch for:
- Are they protecting siding and windows from falling debris?
- Are they using tarps or chutes to direct debris away from landscaping?
- Are they setting aside reusable flashing for inspection?
Decking inspection
Once the shingles and underlayment are removed, the exposed decking tells the real story. A good crew walks every square foot, feeling for soft spots, delamination, and rot.
| Decking condition | What it means | What happens next |
|---|---|---|
| Dry, flat, solid | Good condition | Proceed with underlayment |
| Small soft spots | Localized moisture damage | Cut out and patch individual sheets |
| Delaminating plywood | Peeling layers; moisture damage | Replace affected sheets |
| Significant rot | Structural compromise | Replace sections; assess load-bearing integrity |
| Widespread damage | Systemic moisture or insect issues | Major repair; may pause install |
Rotten decking is almost never visible from inside the attic. It only reveals itself during tear-off. Budget for this possibility. Even conservative contractors will quote per-sheet replacement costs in the estimate.
Material count
Ask for a count: “How many sheets need replacement?” This should be communicated to you before the crew leaves for the day. You shouldn’t find out from the final invoice.
Day 2: underlayment and flashing
Underlayment installation
The underlayment is the water-resistant (or waterproof) barrier between the decking and shingles. Two common types:
- Asphalt-saturated felt (“tar paper”): Traditional; 15# or 30# weights; lower cost; adequate for standard installations.
- Synthetic underlayment: Polypropylene or polyethylene; lighter, stronger, and more tear-resistant; longer UV exposure tolerance; costs more but is increasingly standard in 2026.
High-wind and snow regions should also get ice and water shield. A rubberized membrane applied at eaves, valleys, and around penetrations. Many building codes require it.
Drip edge
Drip edge is an L-shaped metal strip installed along roof edges. It directs water into gutters and protects fascia boards. It’s inexpensive and critical for proper water management.
| Location | Purpose |
|---|---|
| Eaves (where roof meets gutter) | Channels water into gutter; prevents wicking back underneath |
| Rakes (sloped roof edges) | Seals gap between decking and fascia; prevents wind-driven rain entry |
Drip edge comes in colors to match gutters. Standard is white, brown, or black.
Valley flashing
Valleys (where two roof planes meet) see the highest water concentration. There are three installation methods:
- Open valley: Metal flashing runs down the center; shingles cut back from centerline. Durable and easy to inspect.
- Closed woven valley: Shingles from both sides overlap across the valley without metal showing. Clean look, more labor.
- Closed cut valley: One side runs across, the other is cut back. Compromise between open and woven.
Open valleys with metal flashing last longest and are easiest to repair. If your contractor recommends a closed valley, ask why.
Step flashing and counterflashing
Walls, chimneys, and vent pipes require specialized flashing:
- Step flashing: Small L-shaped pieces woven between shingles where a roof meets a vertical wall.
- Counterflashing: Metal cap on top of step flashing, embedded into masonry (for chimneys) or sealed to walls.
- Pipe boots: Rubber or metal collars that seal around plumbing vents.
Inspect these visually if possible. Poor flashing is the #1 cause of roof leaks on otherwise good installations.
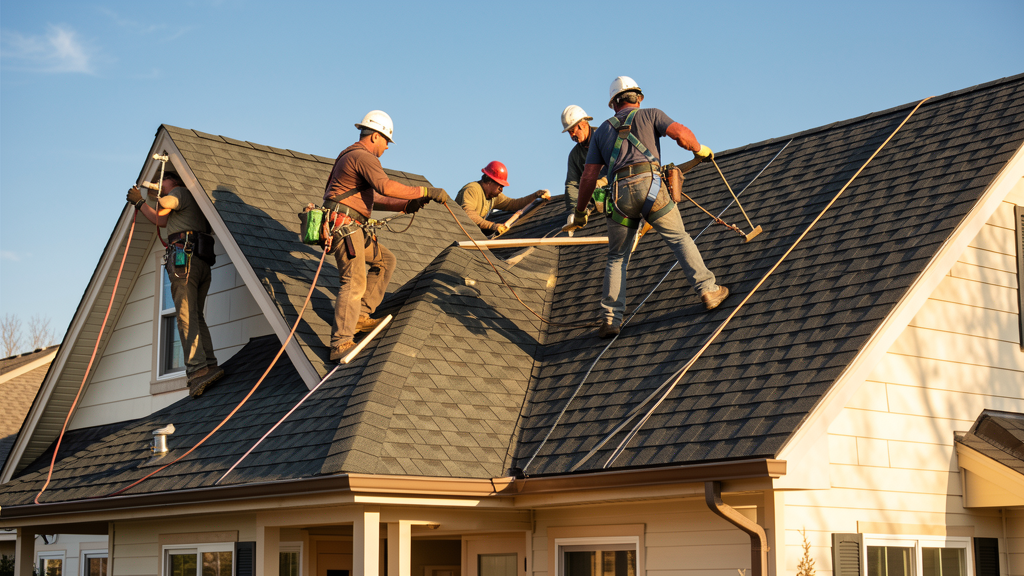
Day 3: shingle installation
Starter strip
Before field shingles go down, a starter strip runs along the eaves. It’s a narrow strip of shingle material with adhesive on the exposed edge. Its job is to seal the first row of shingles and prevent wind uplift at the roof edge.
Important detail: The starter strip should overhang the drip edge by 1/4 to 3/4 inch. This overhang prevents water from running back underneath.
Field shingle layout
The crew installs field shingles in rows, working from bottom to top, offsetting joints between rows to prevent vertical alignment that creates water channels.
Standard architectural shingles require:
- Minimum 4 nails per shingle for standard areas
- 6 nails per shingle in high-wind zones (e.g., coastal Florida, hurricane regions)
- Nails placed in the manufacturer’s specified zone (the “nail strip”)
Nails placed too high don’t secure the shingle properly. Nails placed too low are exposed and rust.
Ridge cap
The ridge (the peak where roof planes meet) gets special ridge cap shingles, pre-formed or field-cut. Many 2026 installations use “ridge vent” — a ventilated ridge cap that allows hot attic air to escape.
Ridge vent is superior to box vents for most homes because it provides continuous exhaust ventilation rather than just point ventilation.
Day 4: ventilation, cleanup, and inspection
Ventilation verification
A complete roofing system includes balanced ventilation:
- Intake: Soffit vents at the eaves
- Exhaust: Ridge vents, box vents, or powered vents at the top
Your contractor should verify existing ventilation and add or upgrade as needed. Insufficient ventilation voids most manufacturer warranties and shortens shingle life.
Cleanup
By the end of day 3 or 4, the roof should be complete. Cleanup includes:
- Magnet sweep of yard and driveway for dropped nails
- Debris removal and dump trailer departure
- Gutter clearing (shingle granules and small debris accumulate)
- Final contractor walkthrough
Don’t assume cleanup happened. Walk the property with the project manager. Check window screens, landscaping, and the driveway.
Final inspection
Two inspections may occur:
- Contractor self-inspection: The project manager walks the roof looking for uneven rows, exposed nails, and flashing issues.
- Municipal inspection: Required in most jurisdictions. The city inspector verifies code compliance, proper nailing patterns, and flashing details.
Ask for the inspection results. Pass or fail, you should know.
What homeowners should do during install
| Action | Why it matters |
|---|---|
| Stay off the roof | Crew liability; no reason to go up |
| Keep pets and kids inside | Falling debris and loud equipment |
| Take before/after photos | Insurance documentation; sale prep |
| Check material bundles on arrival | Confirm brand, line, and color |
| Ask for daily status | What’s done, what’s next, any surprises |
| Walk the final with the manager | Catch issues before payment |
| Verify permit sign-off | Protects future sale; confirms code compliance |
The bottom line
A roof installation isn’t magic. It’s a sequence of specific, inspectable steps. Tear-off reveals the truth about your decking. Underlayment and flashing determine whether you get leaks in year 5. Shingle installation is craftsmanship that shows up in year 15 when the cheap crew’s work starts failing and the good crew’s work doesn’t.
The difference between a good installation and a bad one isn’t the shingles. It’s whether they replaced the rotten decking they found, whether the nails are in the right place, and whether the valleys are flashed properly.
Ask questions. Take photos. And don’t pay the final invoice until you’ve walked the job with the person responsible for it.
If you’re trying to decide between materials first, see our best roofing materials compared guide. If you’re worried about cost, see how to read a roofing estimate.
Frequently asked questions
How long does a roof installation take?
Most standard homes: 2–3 days. Complex or steep roofs: 4–5 days. Weather is the most common delay.
Should I stay home during the installation?
Not required, but recommended for day 1 (tear-off) and the final day. You want to be reachable if they find decking damage.
Do I need to cover furniture inside?
Ceiling-mounted lights and ceiling fans may vibrate. Light items on upper shelves might shake. Cover valuables directly under active work areas as a precaution.
What if it rains during installation?
Professional crews monitor weather closely. They have tarps ready to cover exposed decking. One afternoon of rain with proper tarping usually doesn’t cause damage.
Can I add a skylight during a roof replacement?
Yes, and it’s the best time. The roof is already open, and flashing integration is easier. Expect $800–$2,500 per skylight depending on size and type.